
A featured image of a WordPress post is an amazing way to briefly describe the content. After the post title, a featured image is the most important thing in a post. So, it is essential to include a meaningful feature image in order to provide an accurate description of the content of your blog to the audience.
Most of the premium WordPress themes provide a featured image upload option with the themes. It is simple to integrate an image into a post while using WordPress. Let’s go through the steps.
Log in to WordPress admin panel
Log in to the WordPress dashboard.
Add A new post
From the left navigation menu, navigate to Post > All Posts > Add New.
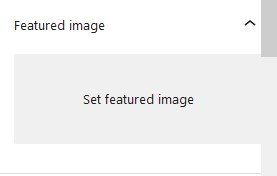
Find the featured image box
Now, add the post title and description. On the right side of the page, you will find an option to add a featured image. Click on that option, and a gray “Set featured image” box will appear. Click on that box to add the featured image.
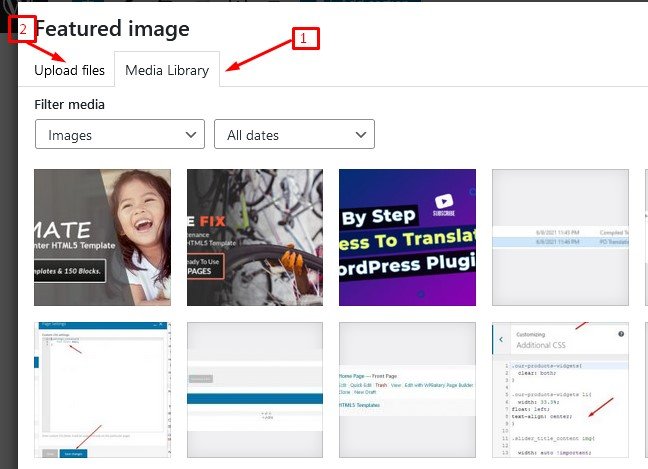
Upload featured image
You can choose an image file from the existing Media Library or “Upload a new” one.
Set the featured image
Once the selection has been completed, click on the “Set featured image” button.

Publish the post
Finally, click the “Publish” button to save the settings.