
Sass(syntactically awesome style sheets) is a popular CSS pre-processor that helps developers write less repetitive CSS codes and generate more organized and maintainable scripts. It is an extension of CSS and offers fantastic features like variables, nesting, mixins, functions, import, include, extends, and many more.
Writing maintainable CSS codes when working on large projects or developing templates is essential for a front-end developer. Adding more CSS code and repeating the same codes in a single file makes managing things difficult once the project requires more layouts. Often, it becomes a nightmare for a frontend developer if multiple people work on the same project.
Sass is the tool that eliminates all the issues. There are several ways to compile the Sass code and generate regular CSS code that browsers can understand. The following tutorial will explain all the steps to set up the Visual Studio Code editor’s extension, which compiles the Sass file and generates CSS code.
Keynotes About Sass
- Designed by Hampton Catlin
- Developer Natalie Weizenbaum, Chris Eppstein
- Launched November 28, 2006
- Filename extensions:.sass,.scss
Source Credit: wikipedia.orgSetup Live Sass Extension
The Visual Studio Code editor provides an amazing option to install an extension for compiling “.scss” files and outputing a “.css” file. Additionally, it can generate a minimized version of the compiled CSS file. This extension helps front-end developers build instant CSS files for their projects. The following tutorial describes how to setup a live SASS extension and compile the files.
Step 1: Open the Visual Studio Code editor.
Step 2: Next, navigate to the Extensions menu from the editor’s sidebar.

Step 3: Search for the Live Sass Compiler and install it.

Step 4: Next, create a new “scss” folder. Then, create a new “styles.scss” file inside that “scss” directory, and the extension will automatically compile all the scss code into a css file. All the compiled code will be output inside the dist folder.

Templates Uses Sass:
We have developed several responsive web templates using the SASS compiler. Here are a few templates that were built using Sass.
SmartFix – Computer Repair Center Template
Pakkapati – Flooring Service Template

Petmate – Animal Care Center HTML5 Template

Advanced Settings
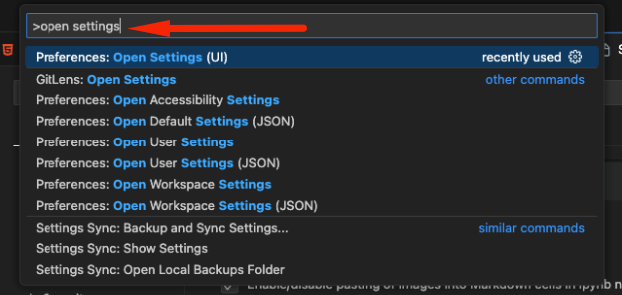
Step 01: In the Visual Studio Code search box, search for “open settings”. Select the “Preferences: Open Settings (UI)”
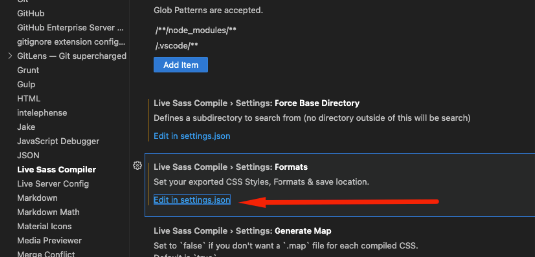
Step 02: From the “Extensions” menu, click on “Live Sass Compiler”. Click “Add Item” to add more settings.

Step 03: Next, click on the “Edit in settings.json”
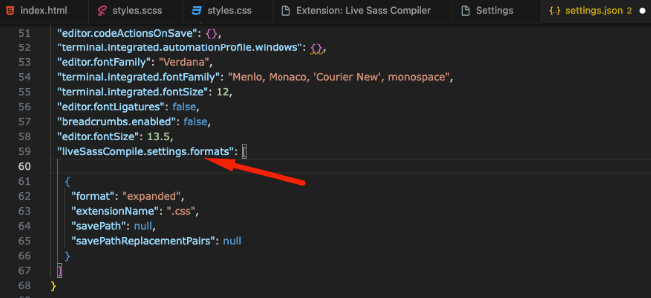
Step 04: It will open a settings.json file, and now you can add a custom settings code here for the live server.
Step 05: All settings information you will get from this following link.
https://github.com/glenn2223/vscode-live-sass-compiler/blob/HEAD/docs/settings.md
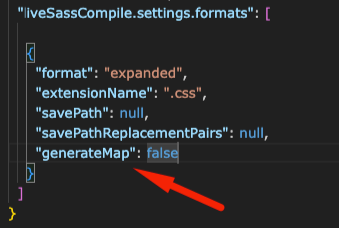
Step 06: If you want to avoid creating a map for the CSS output, add “generateMap”:false in that file and save it.
Step 07: You can also change the source and output directory. For example- I would like to read the scss file from the “src” directory and output the file into the “css” folder. Add the following lines of code in the settings file.

Full settings.json:
You can copy the following JSON codes and add it to your Visual Studio Code editor.
"liveSassCompile.settings.formats": [
    {
      "format": "expanded",
      "extensionName": ".css",
      "savePath": "/css",
      "savePathReplacementPairs": null,
      "generateMap": false
    },
    {
      "format": "compressed",
      "extensionName": ".min.css",
      "savePath": "/css",
      "savePathReplacementPairs": null,
      "generateMap": false
    }
  ],
  "liveSassCompile.settings.excludeList": ["/**/node_modules/**", "/.vscode/**"],
  "liveSassCompile.settings.includeItems": ["/src/styles.scss"],
  "git.confirmSync": false,
I hope this tutorial will help you compile SASS to CSS for your next project.